Granite User Manual
Introduction
- Granite is the granular synthesizer which excels at generating evolving and organic textures, atmospheres and soundscapes
- While complex under-the-hood, the grain engine has been carefully tuned so that any sample can be completely transformed using only a handful of parameters
- The best way to discover Granite's unique sound-processing power is to browse through the Factory Library
- To compare any preset to the original source sample, hold the Compare button at the bottom-left of the waveform display
User Interface Overview
The Header

- The Header displays the name of currently loaded preset
- Click on the preset name to open the Preset Menu, allowing quick access to the Factory Library presets and other favourite folders
- In-app Hints can be enabled by clicking the info icon at the right-hand side of the header
- When Hints are enabled, hovering the mouse over most controls will reveal a short description
The Waveform
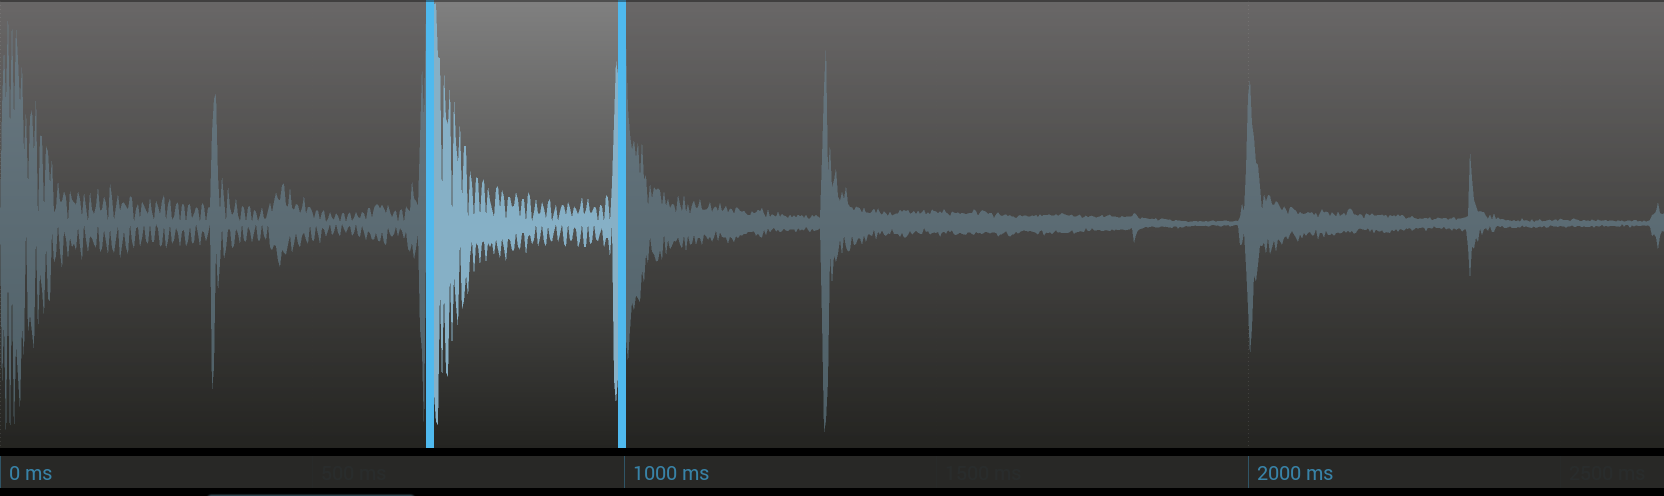
- The large waveform display shows the current loaded sample, as well as the Play Cursor (yellow) and Loop Markers (blue)
- Drag-and-drop samples here, either from the integrated browser or from Windows Explorer / macOS Finder
- When the mouse pointer is over the waveform, the Compare button appears at the bottom-left
- Hold the Compare button to hear the original sample without processing by the grain engine
- Click and drag on the Zoombar beneath the waveform to smoothly zoom and scroll the waveform
- You can also zoom the waveform using the mouse-wheel
The Parameter Area
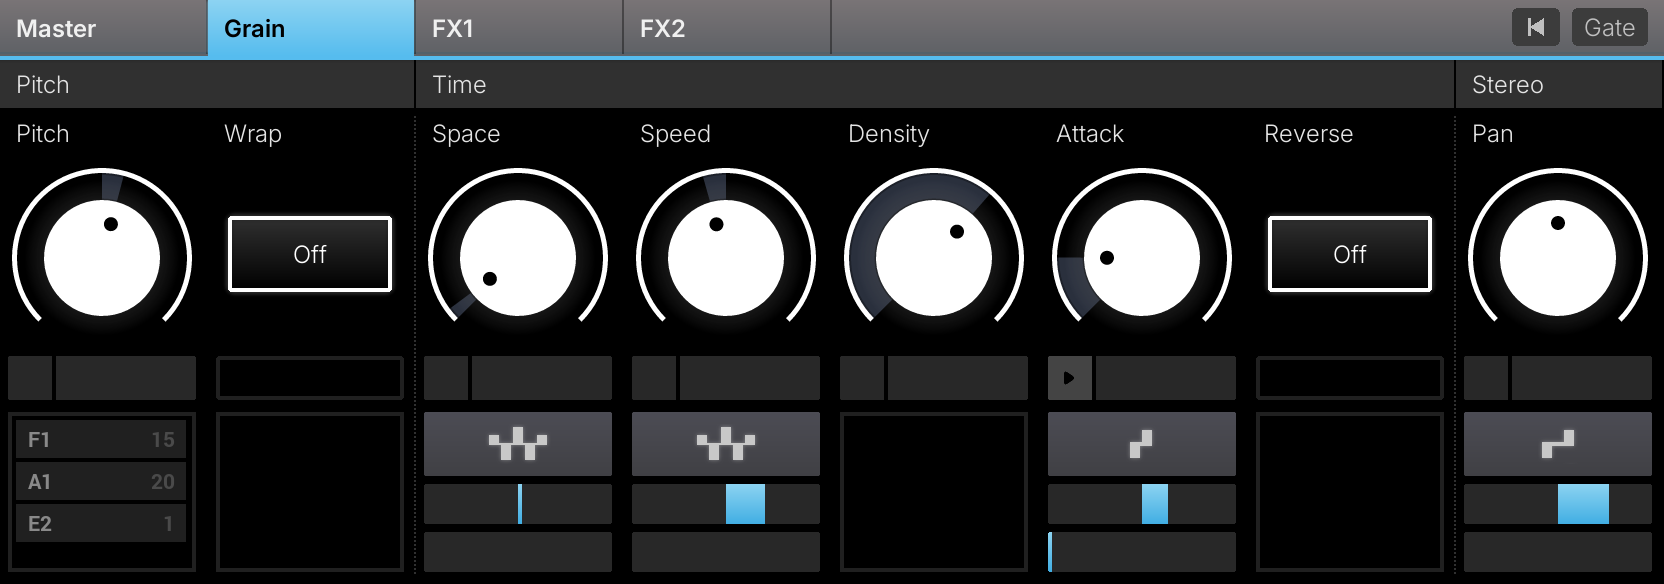
- The lower section of the interface features 4 tabs, each containing a number of parameters for the grain engine
- The Gate button (at the right-hand side) enables the master envelope
- When disabled, the grain engine is free running and is thus constantly audible
- Enable the Gate button to activate the master envelope, this means the grain engine will only be heard while MIDI notes are played
- See The Grain Engine for more details
The Browser
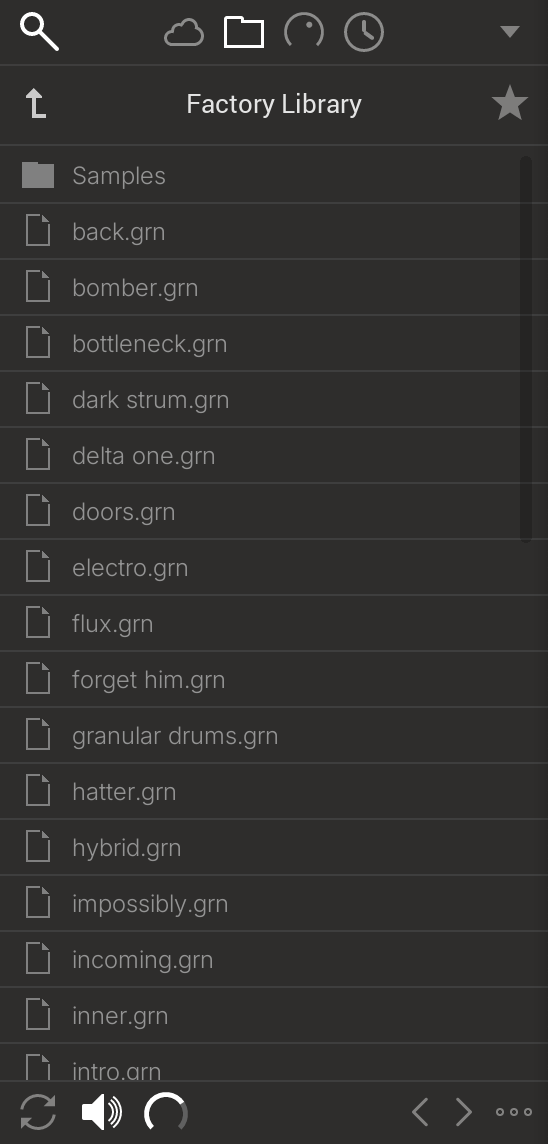
- The Browser is located at the left-hand side of the user interface, and provides quick and easy access to your presets and samples
- The browser panel also provides access to the Assignment Manager, which provides an overview of all real-time parameters and MIDI Learn functionality
- At the top right of the browser is the Main Menu, which includes access to the Setup Dialog
Shared Controls and Shortcuts
Press F1 to toggle hints, F8 to show or hide the browser, and F9 to open or close Setup. Use Ctrl/Cmd+Z for Undo; use Ctrl+Y on Windows or Cmd+Shift+Z on macOS for Redo. The instrument must have keyboard focus.
Shift-drag fine-adjusts most continuous controls. Many controls offer reset, MIDI Learn and automation assignment through their context menu; see The Assignment Manager.
Features marked for upgrade depend on the activated edition or licence. Screenshots illustrate the layout; some controls and labels may differ in the current version.
Files, Presets and Samples
Use the File Browser for folders and samples, PatchCloud for tagged content, and the Preset Menu for quick access to the current preset folder.
Open, Reset and Save
- The main menu provides Reset, Open (including recent files), Save, and Save with Samples.
- Reset returns the instrument to its initial state. Use Undo to recover an edit or a previous preset.
- A normal save references sample files. When moving a preset to another computer, use Save with Samples > Embed to include its samples in the preset, or Collate to collect the samples alongside it. Keep the collected files together when moving a collated preset.
- Preset sample collection and embedding samples in host projects are separate options. Saving an ordinary preset does not make it self-contained.
The File Browser
- Click the path display to choose a drive, Factory Library, User Presets, or a Favourite folder. Use the star to add the current folder to Favourites; manage the list in Setup > File.
- Load a preset from the browser or drag a sample to the instrument. The Open dialog lists the sample formats supported by the installed version.
- Use the speaker button to audition samples before loading them, and the adjacent volume control to set audition level. Cycle Mode allows quick exchange of the current preset or sample.
- Use Ctrl-click on Windows or Cmd-click on macOS to select separate browser items; Shift-click selects a range.
PatchCloud and SoundPacks
- Open the cloud browser to browse tagged Factory Library and SoundPack content and organise local content. Use its search to narrow the results. Ctrl/Cmd+F opens the content search.
- Use Install SoundPack in the main menu to select a downloaded SoundPack file. Online content and downloads require a connection; the File Browser provides access to local files.
The Preset Menu
- Click the preset name to open the menu. Use the folder submenu to choose Factory Library, User Presets, a Favourite, or Browse for another folder.
- Use the previous/next buttons or Alt+Up / Alt+Down to load the previous/next preset. Plain arrow keys may be used by the active editor.
- Click Save in the header to save the preset. Choose a destination in the file dialog when requested.
Missing Samples
If referenced samples have moved, use the Missing Samples dialog. Its Files and Folders views let you locate an individual file or relocate a missing folder. Use Locate to supply the new location. Save the preset or host project after resolving the references. Discard only entries you intend to remove.
File Shortcuts
| Ctrl/Cmd+O | Open |
| Ctrl/Cmd+S | Save |
| Ctrl/Cmd+Shift+S | Save As |
| Ctrl/Cmd+N | Reset |
| Alt+Up / Alt+Down | Previous / next preset |
Keyboard shortcuts apply while the instrument has keyboard focus; the host may reserve some combinations.
The Grain Engine
Introduction
- At the heart of Granite's sound engine are 16 independent grains
- Think of each grain as a mini sample-player, with its own independent play range and sound parameters
- Thus at any point in time, each grain will be playing a particular portion of the sample, with a particular pitch, amplitude and FX settings
Gate vs Free Running Mode

- By default Gate Mode is off, which results in free-running operation of the grain-engine, useful for sound-design and auditioning presets
- To operate Granite more like a traditional MIDI playable instrument, set Gate to on
- This mode enables the master envelope, so that grains are only triggered while the master envelope is active
- To change the default setting for Gate Mode, use the Default Patch feature
- See the Setup section for further details
Waveform Traversal
- Unlike a traditional sampler, Granite does not necessarily traverse the sample in a constant forward or reverse direction
- Instead, the playback speed is a dynamic parameter, and the play position can also jump-around due to the various modulation features
- The main playback speed is defined by the Speed parameter
- 100% is similar to a traditional sampler
- Granite offers speeds ranging from -800% to 800%
- The Speed knob can be modulated, resulting in non-linear traversal (see Recordable Modulation and Cycle Modulators for more details)
- The Loop Markers (blue bars) set the range for sample traversal
- It's possible to record movements of both the start and end markers
- To record movements, click and drag horizontally on the red arrows at the top of each marker
- Right-click on the red arrows to clear any movement
- The Play Cursor (yellow line) shows the position of the most recently triggered grain
Grain Density and Length

- The Space parameter determines how frequently grains are triggered, ranging from a few milliseconds to more than a second
- The grain length is a factor of the Space and Density parameters
- A Density of 0% results in a Grain length equal to the trigger frequency
- With higher Density settings, the grain length exceeds the retrigger frequency which results in more simultaneous, overlapping grains, and a thus a "denser" sound
- The current number of active grains is visualized on the Header by a graph which shows the amplitude of each of the 16 grains at any given moment
- Each grain also has its own envelope, the shape of which is controlled by the Attack parameter
- Not to be confused with master envelope Attack parameter on the Master page
Grain Pitch
- The Pitch knob controls the base tuning of all grains in semitones
- Use Shift to fine-adjust the pitch
- Grains are additionally transposed by MIDI notes played on your MIDI keyboard
- In the case of playing chords, the grain engine steps through each note in the chord with each new grain
- With low Space settings, this results in the musical effect of "printing" the chord onto the sample
- With high Space settings, this can result in an affect somewhat like an arpeggiator
Grain FX
- The grains are additionally processed by a chain of FX
- The controls for the FX are found on the FX1 and FX2 tabs
- See the in-app hints for details on each parameter
Recordable Modulation
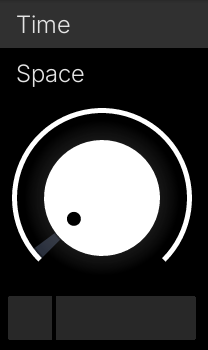
- With the exception of switches and the Master page controls, all of Granites parameters can be modulated via the Recordable Modulation Rings
- This unique feature can quickly add a dynamic, organic element to any patch
- The playback behavior of all modulation rings is affected by the Retrigger parameter on the
Master page
- Off: playback positions run independently of incoming notes
- Legato: restart at the beginning of a new played phrase, retaining continuity while notes overlap
- Always: restart on every incoming note
- To record modulation, simply click and drag in the outer ring of any knob
- The play position bar will turn red indicating recording is in progress
- To clear a recording, right-click on the outer ring
- To pause or resume playback, click the play button underneath the knob
Cycle Modulators
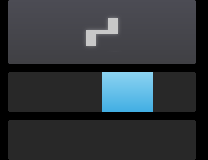
- In addition to the Modulation Rings, most controls also have a dedicated Cycle Modulator
- These are somewhat similar to a traditional LFO
- A shape can be chosen for each modulator
- Each shape consists of a number of discrete values, for example the Bi shape consist of -1 and +1
- Unlike a traditional LFO, the read-out speed of each shape is hard linked to grain retrigger frequency
- This means that each time a new grain is triggered, the modulator proceeds to the next step in the shape
- A good way to understand how the Cycle Modulators work is by modulating the Pan control
- With the Bi shape selected, the Pan position will alternate from left to right on each successive grain
- With the Tri shape selected, the Pan position will rotate between, left, right and centre on each successive grain
- Each Cycle Modulator has Amount and Speed controls
- The amount slider controls the amount and polarity to which the modulator affects the parameter
- The speed knob slows the shape read-thru speed as it is dragged to the right, causing interpolation between the shape values
- Right-click to reset either slider to it's default value
Common Functionality
- Most controls can be fine adjusted by Shift-Drag
- Most controls can be reset to default by Right-Click
Master Controls and Restart
- Attack and Release on the Master page set the master envelope when Gate is enabled. These are separate from the grain envelope's Attack control.
- Velocity sets how strongly incoming MIDI velocity affects grain amplitude. The output level control sets master gain.
- Restart, beside Gate, resets the sample traversal position and modulation playback. Use it to hear a patch again from its beginning without loading it again.
- Wrap offers Off, 2, 3 and 4 to constrain the chord-note cycle. The chord display in the Pitch section shows the current chord.
Grain Controls
| Pitch / Wrap | Transpose grains in semitones and set the chord-cycle wrap. Shift-drag gives fine pitch adjustment. |
| Space | Set the interval between grain triggers. This also affects the pace of cycle modulation. |
| Speed | Set sample traversal from -800% to +800%. Zero holds the traversal position while grains continue; negative values traverse backwards. |
| Density / Attack | Set grain overlap and grain-envelope shape. |
| Reverse / Pan | Reverse each grain's playback direction and set its stereo position. Reverse is separate from the direction of sample traversal. |
FX Reference
| Shape | Shape raises quieter material; Drive adds distortion. |
| SR | Frequency sets sample-rate reduction; Mix blends the processed and original signals. |
| Filter | LP, BP and HP modes, with Cutoff, Resonance and Mix. Tone adjusts the tonal balance. |
| Reverb | Size, Time, Tone and Mix set the space, decay, tonal balance and wet level. |
Each FX section has an enable/bypass control. Cycle shapes are Bi, Tri, Flip, Sine and Random. Recorded modulation and cycle modulation can both affect a parameter.
Audition and Navigation
Hold the waveform's Compare button, or hold P, to audition the original sample. Release to stop auditioning. Page Up / Page Down switches parameter pages. Preset navigation uses Alt+Up / Alt+Down.
The Assignment Manager
Open the Assignment Manager from the browser's control panel. It lists the real-time parameters available for MIDI control and, in a plug-in, host automation. Select a parameter in the interface to find it in the list.
MIDI Learn
- Connect and enable the controller. In standalone, enable its MIDI port in Setup; in a plug-in, route its MIDI through the host.
- Select the parameter, choose the MIDI view, and click Learn.
- Move the hardware controller while Learn is active. Click Learn again to stop learning when needed.
Supported parameter controls also offer MIDI Learn in their context menu. An assigned control offers an Unassign MIDI CC command.
Host Automation
- In the plug-in, select AUTO in the Assignment Manager.
- Select the parameter and click Assign to allocate an available Automation ID. Alternatively, choose Assign Automation ID in the control's context menu.
- Select that automation parameter in your host and record or draw the automation there.
An assigned control offers an Unassign command in its context menu. The host controls which automation lanes are visible and whether the plug-in receives MIDI CC messages.
Editing and Reusing Assignments
- Double-click an assignment entry to edit its numeric ID. Clear the entry to remove the assignment.
- The Assignment Manager's menu provides Reset for the selected assignment type.
- In the MIDI view, use Open and Save to reuse MIDI assignment templates (.midicc files).
Only real-time parameters appear here. Use the instrument's modulation system for destinations that are exposed through modulation rather than direct host automation.
Setup
Open Setup from the main menu, or press F9. Select a page using the tabs. Audio and MIDI device configuration is available in the standalone application; a plug-in receives audio configuration, MIDI and transport from its host.
Audio (Standalone)
- Select an audio Device, then choose a supported SampleRate and Latency. On Windows the standalone application uses ASIO; on macOS it uses Core Audio.
- Sample rates are expressed in Hz: 44100 Hz is 44.1 kHz, and 88200 Hz is 88.2 kHz. Higher rates increase processing load and do not improve every sound.
- A smaller buffer gives a faster response but requires more processing headroom. Increase latency if you hear crackles or dropouts.
- Enable the required output channels in the Outputs list. The main stereo signal uses the first output pair. If the device offers its own control panel, use Control Panel to open it.
MIDI (Standalone)
Enable the MIDI input ports you want to play or use for MIDI Learn. In a plug-in, route your keyboard/controller to the instrument track in the host. Enabling a port in the standalone application does not configure the plug-in's host routing.
File: Startup and Default Patch
- In the plug-in, Store Current in Default Patch stores the current instrument state as the starting point for new instances. Restore Factory removes this custom default.
- In standalone, the Startup section offers Recall Last Session.
File: Sample Embedding
- Embed Samples in Host Projects includes sample data when the host saves the instrument state, subject to Max Size. An Unlimited choice is available.
- If the required sample data exceeds the limit, keep the referenced files accessible. Choose an appropriate limit before relying on a project to carry its samples.
- For a portable preset outside a host project, use Save with Samples; see Files, Presets and Samples.
File: Favourites
Add or remove Favourite folders in the Locations list. These folders provide shortcuts in the File Browser and Preset Menu.